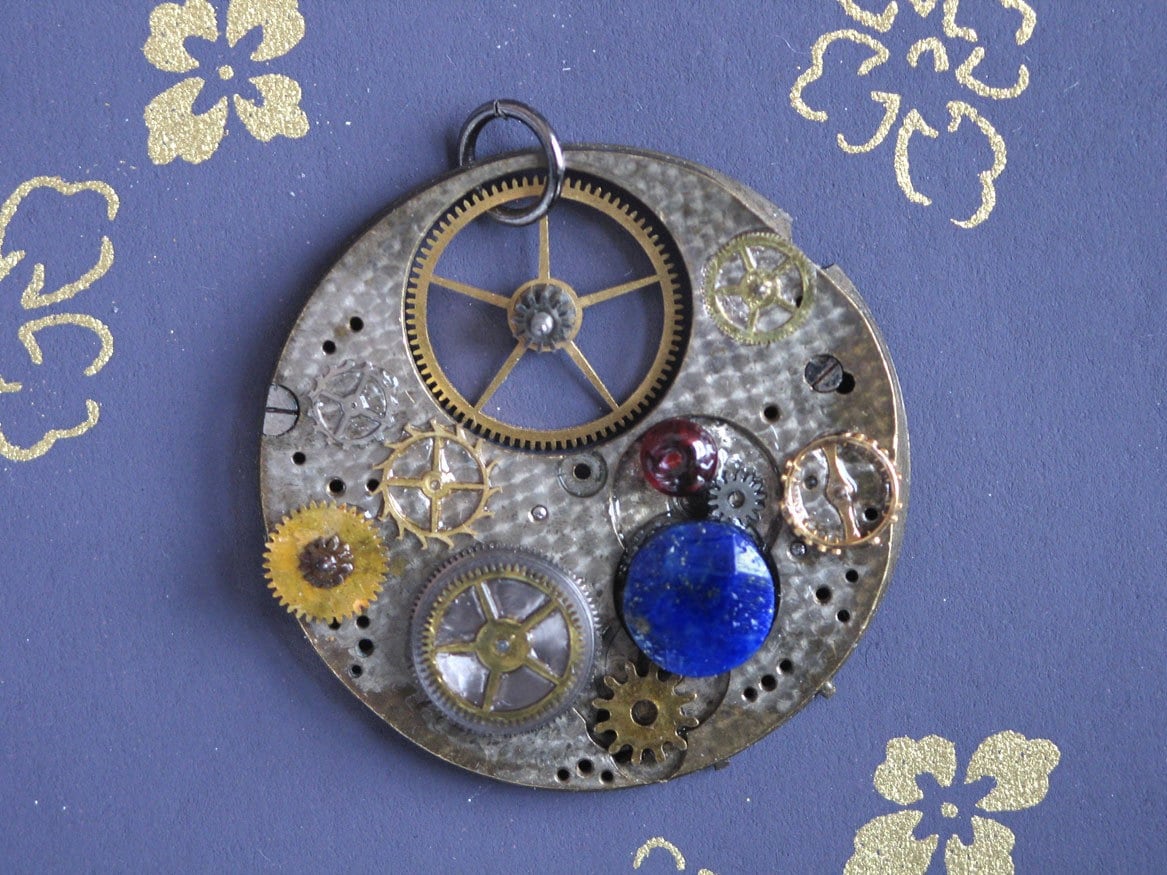
holy crow. I've managed to complete more new pieces of jewelry this past 2 weeks than I have in months. Most of it is a steampunked style of jewelry - pocket watch pieces, gears etc. And of course a few pieces of "cyberpunk jewelry".
With the weather halfway decent I could finally take some photos. Thats the problem with a Natural Light obsession. Cloudy dark days don't do it for me. Bright sun also has its own problems. Today looks like another good day - bright and flat skys.
What does this all mean? Basically I've been working like a fiend to get new designs up to Etsy. I do not know if the Shopping Holiday craze has decended or the sporadic marketing attempts I've been doing.
In the past week I've almost had 30 items up on etsy. For me that is a HUGE number. I custom make all my designs... so its just me sitting there in my little crowded room, trying not to drop tiny gears on the floor where they'll get lost in the cracks. This should be easy but it isn't. :D I work a few hours every day for my brother - doing that driveway thing - but when its done - in theory I've got a few hours to make some steampunk earrings, some necklaces and work on some weirdo sculptures.
In reality:
5 hrs for my brother: 9-2pm. or so
1 hr for: lunch, minor cleaning: 30 min. shower, dressing, more minor cleaning: 30.
Suddenly it will be 3pm.. emails. Posting stuff. Shopping. Making dinner.
Wait! the light is great.. take those photos!
Wait, another email from someone re: steampunk jewelry!
Wait.. wait.. wait..
Next thing I know it will be 5:30 and I've CREATED NOTHING... but dinner.
So to get 28 pieces of jewelry up on etsy is an accomplishment. I don't know how other people manage to list 50 or 100 or 200 things. omg. They prob work full time at it. Or have a co-op or something. Listing 28 pieces is for me an EXPLOSION of jewelry.
But now .. I've had sales. The last 2 weeks have been almost as busy for my store as the time that I had the article about my work and etsy in WIRED Magazine. I'm tripping over myself to make sure the work gets sent out promptly and well packaged. and now i've gotta plan for 3 craft shows in Dec!
rains it pours. make hay while the sunshines. It will likely be very quiet in January!
Showing posts with label "jewelry photography". Show all posts
Showing posts with label "jewelry photography". Show all posts
Friday, November 20, 2009


Tuesday, September 15, 2009
Before and After Photos - taking good photos for Etsy
So I have to admit I did a long stint helping review work for Stock photography - in a now sadly defunct site. It was a real eye opener. After you have seen 300 photos of a bunch of carrots your eyes glaze over... and then some clever bugger comes along and sends a photo of a bunch of carrots and you say, OMFG look at those carrots!!!
That's the secret of a good photo. I'm not even close to achieving that.. but I learned a lot of tricks Even when i take a great and interesting photo - I still get emails from customers saying: Oh is so much better in Real life!
I try not to spend too much time ditzing around with photos. If I spend 4 hours playing with photos - and i still pay myself - my jewelry would be Much More Expensive. And to be honest I feel its not fair. A customer isn't buying a photo. So I try and limit my "ditzing around time" to about 30 min. Less if I can. Usually I have 2 shots I might spend more time with. As well I try and use all 5 photos. Photos help sell the work.
After having sold nearly 140+ pieces - this equals about 700 photos just to etsy. Thats about 350 hours of photo time. If I was working a 40 hour week that would be over 8 wks. 2 months of work. And that won't count all the didn't-make-it photos. The ones with the hairs and dust and omg-is-that-a-fly?? on the shots.
You really want to get as close to a good photo right from the start. As important as it is to take a good photo there are a few BASICS. This little article won't help much for someone who has no idea about photography. You'll have to check some other sites to help with that.
BASIC THINGS TO CONSIDER WHEN TAKING YOUR PHOTOS FOR ETSY: EXAMPLE -- I took this yesterday. To be honest I wasn't in the mood for taking photos, so they are kind of not my best shots. Perfect for this post though...
BEFORE:
1. underexposed. I was being lazy and didn't set up a tripod. Hand-held at 1/30 F2.8 ISO50
2. crooked - I should have spent a bit more time laying it out. sigh.
3. strong shadows. Not terrible - but I didn't use a bounce - see above: lazy. grey.
4. bland background - bland but one of my fav's. it has a lot of black spots but I knew i'd be correcting and adding in a layer.
AFTER: time - 22 min
1. exposure fixed. used - brightness & contrast.
2. straightened (still not perfect but not bad. It is straight and cropped square. My only nitpick would be that the chain is more exposed on the left. shrug).
3. shadows minimized. Cloned out most of the strong ones and dodge out others.
4. background was okay but I added a layer of texture. I did this because I use that textured paper a lot and want something different. Plus - this is a "mechanical" piece. The original background was subtle and organic. I wanted something a bit more textured. In a larger version - clickclick on it - the On-Off switch looks 3d. It does stand a bit forward of the chain so thats okay.
5. cropped - this will be the main photo in when I upload the photo. I look at the photos reduced to 30%. If they look interesting when they are tiny .. thats great. Sites like etsy want squares. Since I was a bit lazy I added some of the background to the right side of the photo. Really I should add a bit more to the bottom so it is centered - but I've hit my 20 min time limit. This will be the main photo in the Etsy upload.
one thing I did that isn't the best is along the left side of the switch it is a wee bit blurry. Thats an editing issue I will correct. later. maybe. but because there will be 4 other photos I won't worry too much. This recycled necklace is made out of different electronic elements. Steampunk jewelry 0r cyberpunk jewelry or maybe just some real geek jewelry. And yeah, the switch does work. :D
Do let me know if you liked this article!
Cheers
Zero
That's the secret of a good photo. I'm not even close to achieving that.. but I learned a lot of tricks Even when i take a great and interesting photo - I still get emails from customers saying: Oh is so much better in Real life!
I try not to spend too much time ditzing around with photos. If I spend 4 hours playing with photos - and i still pay myself - my jewelry would be Much More Expensive. And to be honest I feel its not fair. A customer isn't buying a photo. So I try and limit my "ditzing around time" to about 30 min. Less if I can. Usually I have 2 shots I might spend more time with. As well I try and use all 5 photos. Photos help sell the work.
After having sold nearly 140+ pieces - this equals about 700 photos just to etsy. Thats about 350 hours of photo time. If I was working a 40 hour week that would be over 8 wks. 2 months of work. And that won't count all the didn't-make-it photos. The ones with the hairs and dust and omg-is-that-a-fly?? on the shots.
You really want to get as close to a good photo right from the start. As important as it is to take a good photo there are a few BASICS. This little article won't help much for someone who has no idea about photography. You'll have to check some other sites to help with that.
BASIC THINGS TO CONSIDER WHEN TAKING YOUR PHOTOS FOR ETSY:
- 1. Exposure. If your photo is over-exposed there is not a lot you can do to correct it if all the highlights are blown out. For me personally its easier to correct under-exposure. The more over-exposed the photo is the harder it gets to correct.
- 2. Centered - for Etsy and similar sites its really vital that your product is centered. Oh sure it can be artistically placed to one side. It can come at a slant. But if you are cutting off a section of your work or say the really pretty beads aren't show then your customer won't see them. You've got just a few chances to grab their attention - so if part of your photo is missing - chances are good they won't click to find it.
- 3. Large as Possible - You want to fill up at least one of your photos with the product. You might not get in all of it - but get the bulk of whatever it is - in the center and Large!
- 4. Focus. - in focus not blurry. Did you use a tripod?
- 5. Minimal Shadows - yes. sure daylight is great - but direct sunlight causes shadows. Shadows create distortion. In the tiny thumbnails people review the shadows will look like part of your work. Use a bounce. (another photo term for you to look up). A bounce will help minimize the darkness. I have used: pie plates, pot lids, pieces of paper - as well as a store-bought Bounce. The paper works fine.
- 6. WHITE. Anything in your photo that is white should be white. Are your whites white? If your white beads look GRAY or Yellow.. you need to get a photoshop-type program and adjust them. This is critical. If your customer thinks the beads are yellow and gets white beads they won't be pleased. I won't click on any photo of anything where the product looks gray. Brighten it up.
- 7. Straight... this depends on the shot but a good example is the huge number of shots we use to reject because the horizon was crooked. I like things that are straight in the photo - especially if I suspect the person was trying to make it straight.
- 8. Background. I prefer neutral backgrounds. Not too fancy. If i have to spend 40 minutes dicking around with "composing a background" - say one of lace and a pretty book etc. That is 40 minutes I could spend writing, making new jewelry, sleeping. Because these are product shots you want a good, interesting background - but not one that distracts from your work. As well if I create a photo with a book, some lace, pretty flowers - I will make sure I use that in several product shots. But here's the catch - I don't want all my pieces to have the same look. Thats why I will often use layers.
 EXAMPLE -- I took this yesterday. To be honest I wasn't in the mood for taking photos, so they are kind of not my best shots. Perfect for this post though...
BEFORE:
1. underexposed. I was being lazy and didn't set up a tripod. Hand-held at 1/30 F2.8 ISO50
2. crooked - I should have spent a bit more time laying it out. sigh.
3. strong shadows. Not terrible - but I didn't use a bounce - see above: lazy. grey.
4. bland background - bland but one of my fav's. it has a lot of black spots but I knew i'd be correcting and adding in a layer.
AFTER:
 time - 22 min
1. exposure fixed. used - brightness & contrast.
2. straightened (still not perfect but not bad. It is straight and cropped square. My only nitpick would be that the chain is more exposed on the left. shrug).
3. shadows minimized. Cloned out most of the strong ones and dodge out others.
4. background was okay but I added a layer of texture. I did this because I use that textured paper a lot and want something different. Plus - this is a "mechanical" piece. The original background was subtle and organic. I wanted something a bit more textured. In a larger version - clickclick on it - the On-Off switch looks 3d. It does stand a bit forward of the chain so thats okay.
5. cropped - this will be the main photo in when I upload the photo. I look at the photos reduced to 30%. If they look interesting when they are tiny .. thats great. Sites like etsy want squares. Since I was a bit lazy I added some of the background to the right side of the photo. Really I should add a bit more to the bottom so it is centered - but I've hit my 20 min time limit. This will be the main photo in the Etsy upload.
one thing I did that isn't the best is along the left side of the switch it is a wee bit blurry. Thats an editing issue I will correct. later. maybe. but because there will be 4 other photos I won't worry too much. This recycled necklace is made out of different electronic elements. Steampunk jewelry 0r cyberpunk jewelry or maybe just some real geek jewelry. And yeah, the switch does work. :D
Do let me know if you liked this article!
Cheers
Zero
Friday, March 14, 2008
Non-Pro Inexpensive DIY Jewelry Photography
 I'm on a budget. I can chose to spend hundreds (or thousands) on a Camera, Lenses, Light Tent, Reflectors etc. or I could pay someone with all that stuff to take shots. Unfortunately, I don't earn enough for a $2000 investment (or more) - where I'd prefer to put my money towards materials (or a vacation! please??!)
Please scroll down to see some of the excellent tips provided by others as well.
I did stock photos for a few years - and wow. did i learn a lot (and make little). Basically though, I'm pretty confident about my photos of the steampunk jewelry. They might not be the best/ most original out there... but they are detailed, focused and well lit.
I shoot all my jewelry in my kitchen where I get a lot of light. Sometimes, a bit too much light ... so I have some light gauzy curtains to help cut the glare. I'd love to buy a light tent - or made one - but I don't have time/space for all that.
I can get the results using a few simple things:
1. Tripod
2. Reflector
3. A non-SLR digital camera. It has a "live view" that allows me to compose the shot, do adjustments and check things like: White Balance and Exposure.. I use my trusty Canon G6 - which is now about 4yrs old and I bought a 2nd one off ebay for $200. FANTASTIC camera - sharp - lots of manual options - and does the job.
1. Tripod:
a tripod is a must! It doesn't have to be a full sized one - I've got 2 small tripods - but the thing it should do is allow the camera to point straight down towards the object you are shooting. That way, all you need to do is lay it out, arrange it and focus. I also use the timer on my camera - a 2 second delay - so there's no problem with camera shake when you press that button.
I used this tripod for a while but I have a slightly larger one now. I got it on sale at a camera shop for $15. I've been awesomely happy with this one: a Celestron Tabletop Tripod... which is $15 as well. Sturdy. I'd recc. it for most jewelry photography.
2. Reflector:
This helps eliminate shadows. If your light source for example is from the right side you'll have shadows on the left of the object unless it is incredibly flat. My jewelry might only be .5cm thick but it still casts shadows... so to eliminate those annoy shadows that can distort your object, place a reflector on the left side. It will bounce the light and get rid of a lot of shadows. You'll see these sometimes called "Bounces" for this reason
A reflector can be an expensive, but worthwhile investment for $50 + or it can be as cheap as a piece of bright white cardboard. I've used both. If you have an external flash you can point it at the white board and it will bounce off without giving you horrible flash-shadows and reflections. So costs can be $1 for some bright white card stock.
You should avoid using (imho) the flash units on most cameras... especially if you don't want - can't afford to spend a lot of money.
3. Cameras:
Do you need an expensive camera? Not for this work.
On my etsy site they ask for images about 1000px. - which is about the smallest my old G6 will take - I actually resize them down for etsy.com but I keep them larger for my Flickr. You *CAN* take great shots with a point-and-shoot camera - and a lot of them have manual options as well. (the canon G5 is a cheap cheap used camera that will be worth the investment if you are looking for jewelry photography camera for the web). Sure, people will tell you you Must Have X. But save your cash... unless you are planning on doing jewelry photography for a living. And even then, it can cost you more in camera gear than you could sell in 5yrs of jewelry making.
Who cares what megapixel! Its going on the web. You don't need 10 mpx to resize and throw out 9megapix of your photos. Look at used! Save that money! :D
Other Tips:
If you are placing an item - say a painted cup or glass - near a wall - make sure it is far enough away from the wall so it doesn't cast a shadow.
Use natural light - it often provides the best light but avoid strong direct sunlight... avoid those shadows!
Most of my photos have the brightness and are contrast adjusted, some times some dodging and of course cropping.
If you're having problems with the focus you are probably too close. Back up a bit, try it again. Don't forget you can crop down your image.
Get / learn some basic Photoshop. Even the older editions are worthwhile. If you are looking at using a different program make sure it has "Brightness/Contrast".
Use a light / bright - fairly neutral background. Try a few different colourful ones but remember the background should compliment and not distract from your product. Try different materials: lace, a scarf, some interesting prop.
Make sure your background - if it is dark especially - is free from dust. After you've laid out your jewelry - blow the dust away. Even if you can't see it, sometimes it will show.
Buy some lovely paper. A few sheets of handmade papers are a worthy investment.
Plan it out - take a bunch of photos at once - just swap out that paper! Later on you can review it all and chose a variety of shots.
================
Additional Tips from other helpful etsy people:
mamabetsy - who has some great close up shots in her shop suggested:
"people can use wax or tissue paper on the window to filter the light. I like to see different angles and hopefully the piece hanging, if that is appropriate. I think that focus, lighting, and clarity are key as well as keeping a consistent non cluttered look."
Good luck and good shooting! Lemme know if you have any ideas / suggestions or things to add to the Tips.
Subscribe to:
Posts (Atom)


 Posts
Posts


